
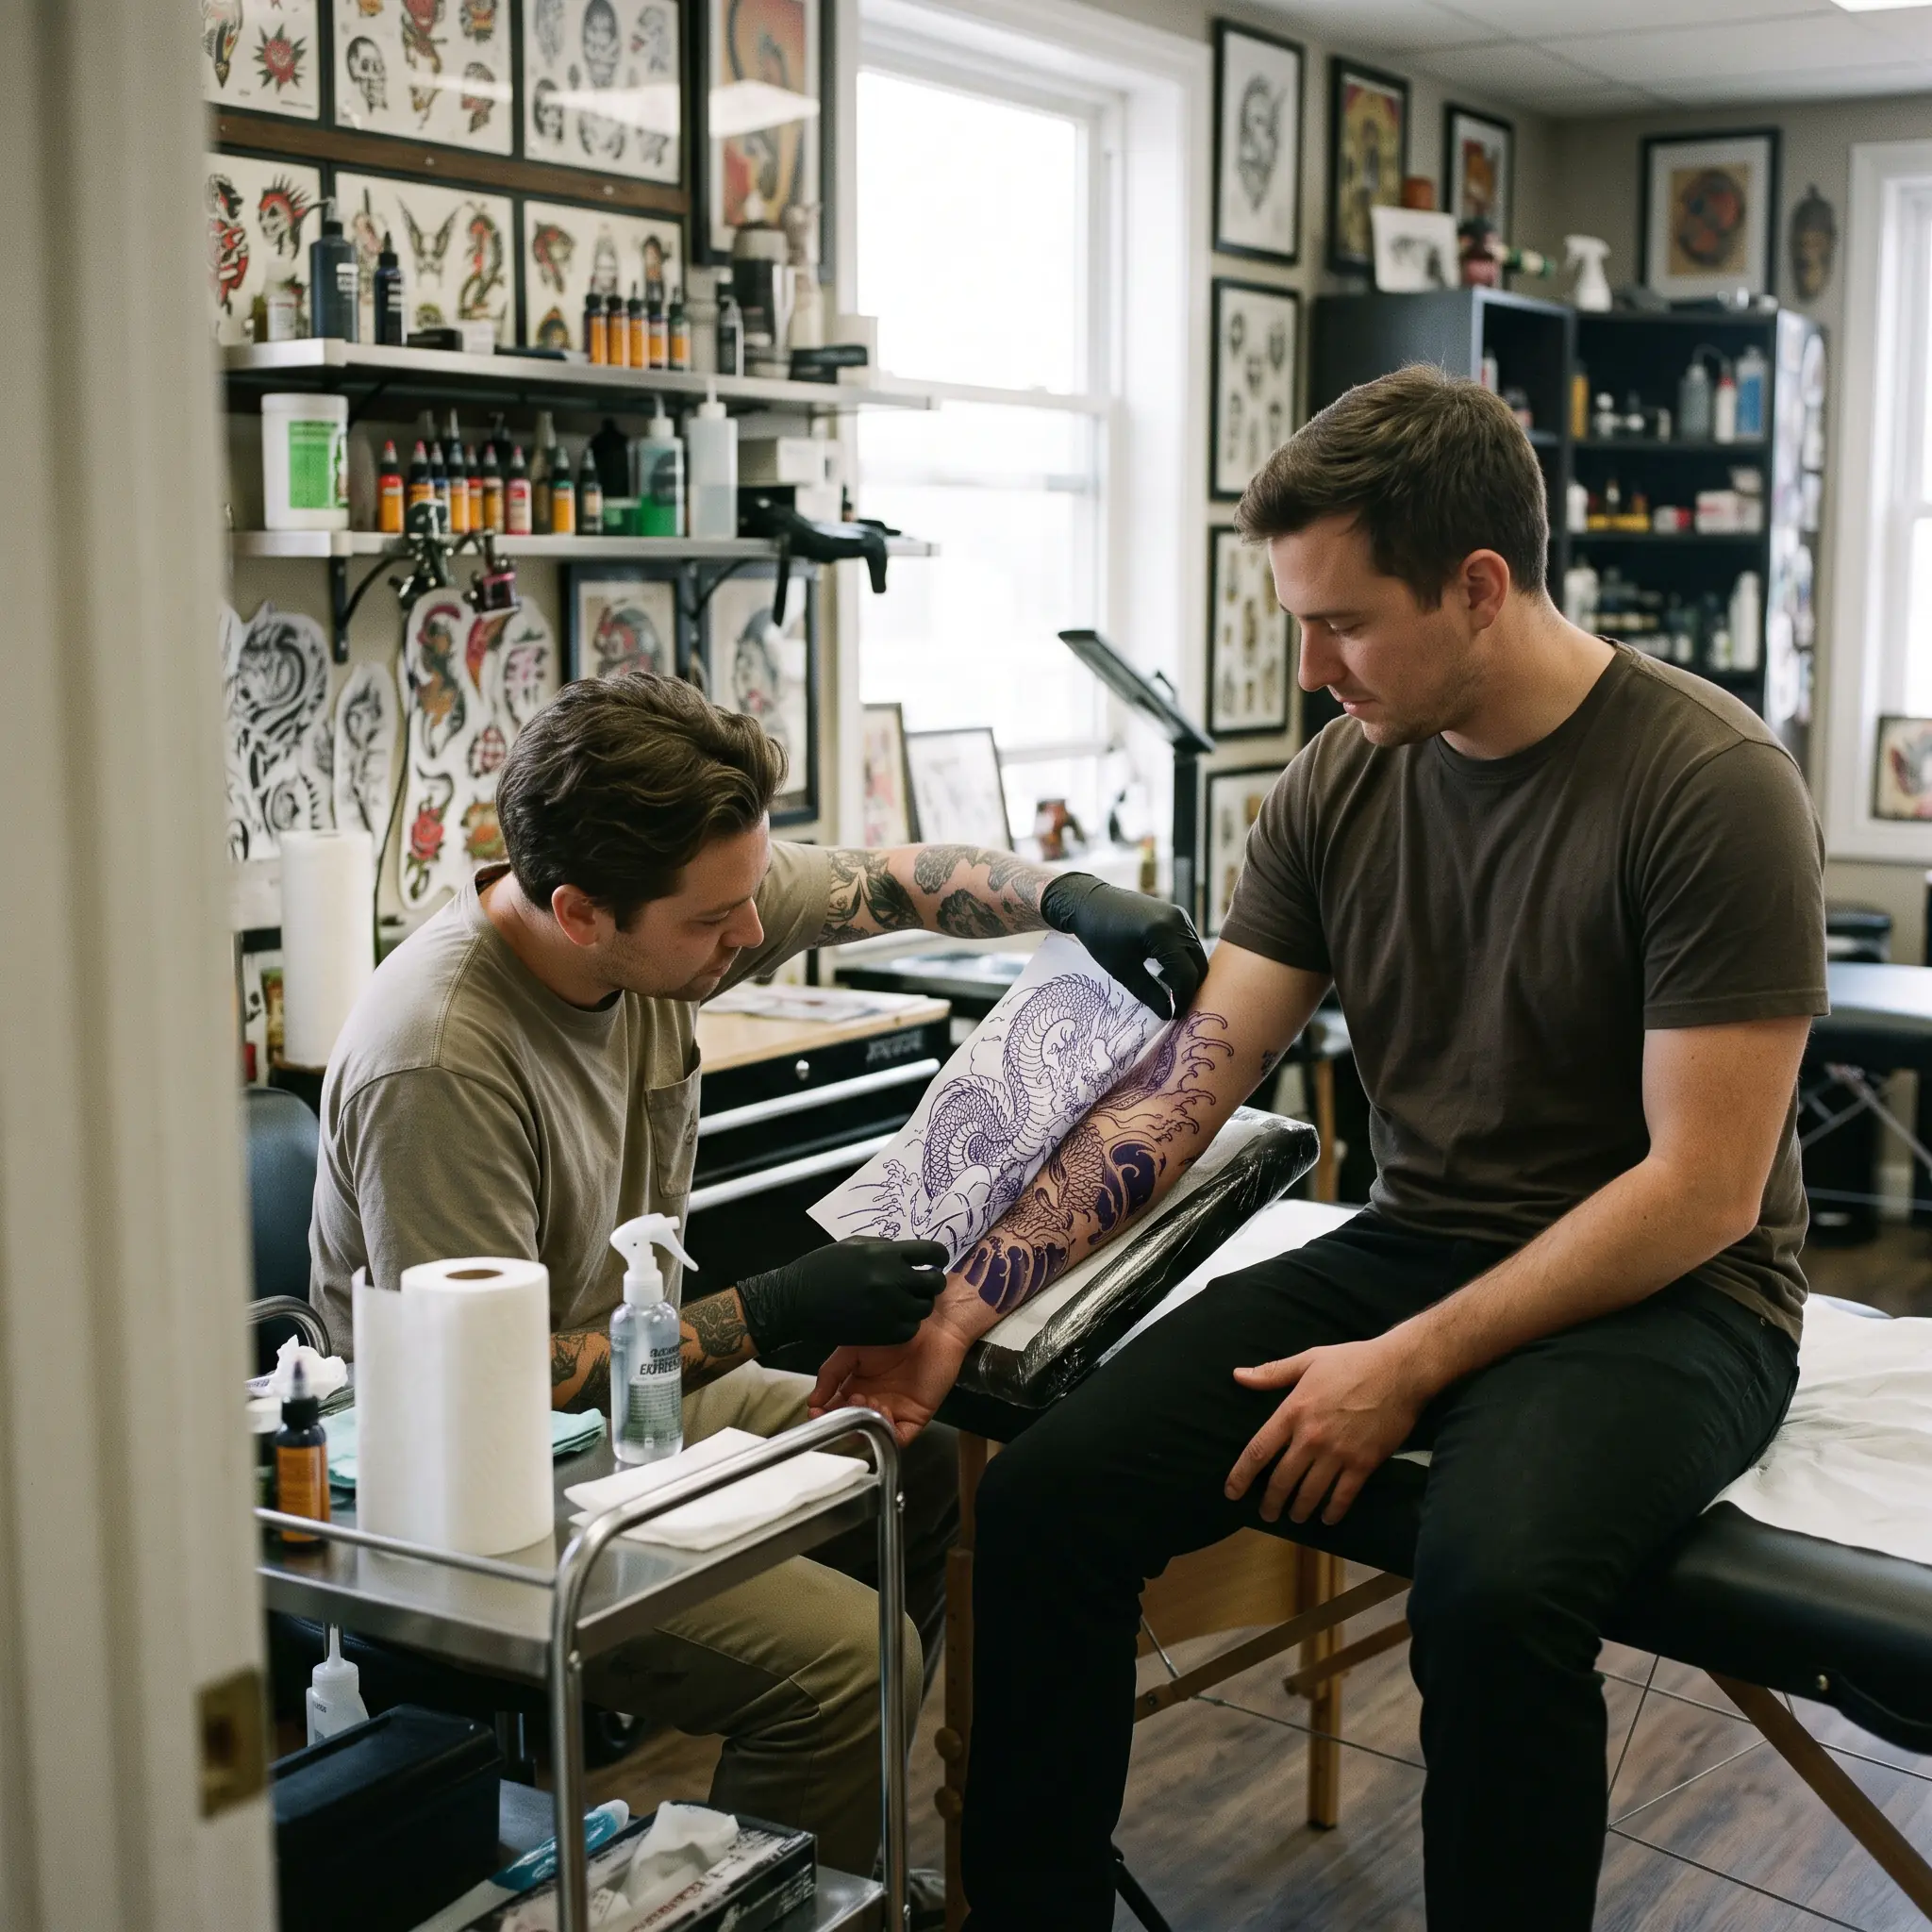
Learning how to prepare for a Japanese tattoo sleeve is the most critical first step before committing to extensive body art. Unlike smaller standalone pieces, a full traditional sleeve transforms your entire arm into a unified, living narrative—requiring careful planning, physical stamina, and proper aftercare to ensure a safe and stunning result.
Stepping into such a project can feel intimidating. How many appointments will it take? How do you choose complementary motifs like dragons, koi, and guardian lions? What should you eat before sitting in the chair for five hours, and how do you care for raw skin between appointments?
Careful preparation eliminates guesswork and protects both your health and your investment. This guide walks you through every stage of the journey—from conceptualizing your design and collaborating with your artist to preparing your body, managing long studio sessions, and supporting proper skin recovery.
What a Large Japanese Tattoo Sleeve Involves
Before booking your first appointment, it is essential to understand the architectural scope of large-scale Japanese tattoo work.
Full Sleeve vs. Half Sleeve
- Full Sleeve (Nagasode): Covers the arm from the top of the shoulder down to the wrist bone. It provides maximum canvas area, allowing multiple narrative layers—such as an ascending water creature transitioning into a celestial deity in the sky above.
- Half Sleeve (Gobusode): Typically runs from the shoulder cap down to just above the elbow crease, or covers the forearm from the elbow to the wrist. It offers an impactful, easily concealable piece with fewer total hours in the chair.
- Chest Panel Extension (Hikae): Many traditional collectors choose to pair either a half or full sleeve with a connected chest panel, such as traditional foo dog and dragon chest tattoos, framing the pectoral muscle and collarbone.
How Large Projects Differ from Smaller Tattoos
A small tattoo is a single event; a large sleeve is an ongoing physical process. A full sleeve requires multiple multi-hour appointments spread across several months. The work proceeds in distinct phases:
- Linework and main subject contours.
- Background blocking (wind bars, clouds, and crashing waves).
- Soft background shading and charcoal gradients.
- Color saturation, fine secondary details, and highlight packing.
Because the process is gradual, your skin will constantly cycle through active tattooing, scabbing, peeling, and settling. Realistic expectations about pacing prevent mental fatigue during the middle stages, when the design is only partially shaded.
Planning Your Japanese Tattoo Sleeve Before Booking
Japanese tattoo compositions rely on structured balance, seasonal harmony, and deliberate background framing rather than an arbitrary collage of unrelated images.
Choosing Your Primary Subject
Start by selecting one or two primary motifs that resonate with you:
- The Japanese Dragon (Ryu): Unlike Western dragons, the Japanese dragon is an auspicious water deity embodying wisdom, protection, and benevolence; while full sleeves showcase grand scale, many collectors start with small Japanese dragon tattoo ideas to understand linework density. Authentic Japanese dragons traditionally feature three claws on each foot, distinguishing them from imperial Chinese dragons with five claws.
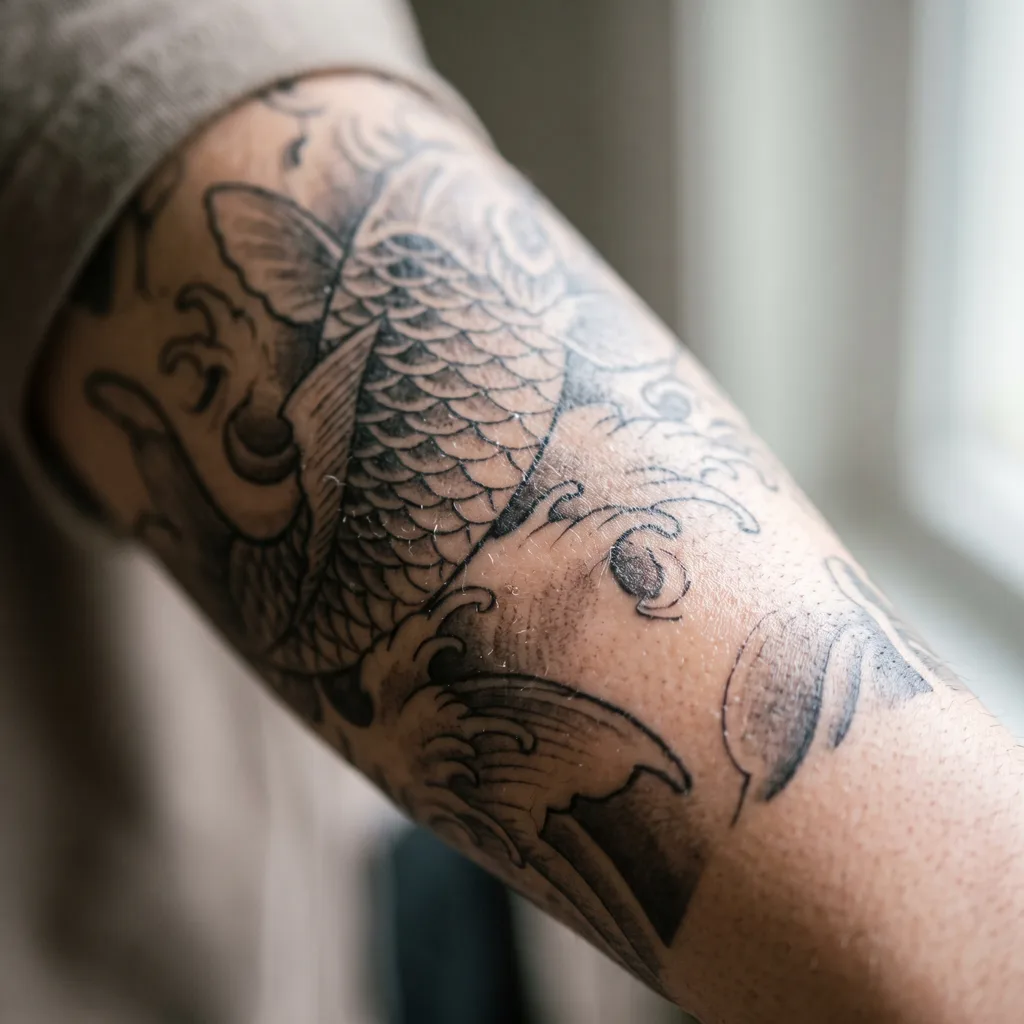
- The Koi Fish: Celebrated for perseverance and ambition, drawing from the legendary Dragon Gate parable—a dynamic narrative often captured in black and grey dragon and koi fish tattoos where a persistent carp swims up a waterfall to transform into a celestial dragon.
- The Guardian Lion (Karajishi or Komainu): Often called Foo Dogs in the West (a term rooted in Chinese guardian lions), the Japanese Karajishi represents courage, royal dignity, and fierce physical protection against negative influences.
- The Tiger (Tora): Symbolizes courage, terrestrial power, and resilience, frequently paired alongside dragons to represent the balance between earth and sky.
Unifying the Background Elements
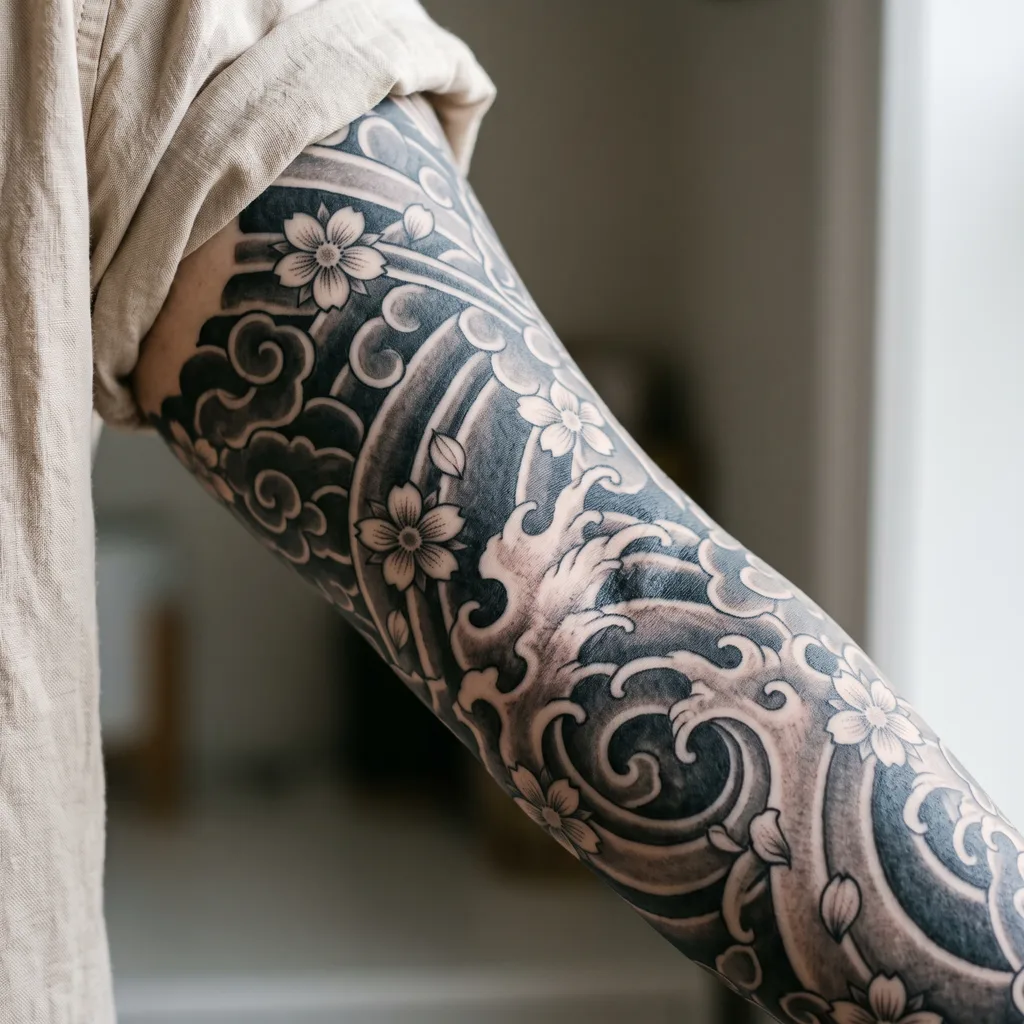
What transforms individual creatures into an authentic Japanese sleeve is the background work (Mikiri):
- Wind Bars (Hikari) and Clouds (Kumo): Used to anchor flying motifs, sky creatures, and seasonal flora.
- Crashing Waves (Nami): Ground aquatic motifs like koi, water dragons, and lotus blossoms.
- Seasonal Flora: Traditional Japanese aesthetics avoid clashing seasons. Cherry blossoms (Sakura) belong to spring; lotus flowers represent summer; chrysanthemums (Kiku) and maple leaves (Momiji) represent autumn. Discuss seasonal harmony with your artist to ensure your chosen elements tell a cohesive story.
Anatomical Flow and References
A successful sleeve moves naturally with your muscle structure. When your arm twists, the dragon’s body should elongate naturally rather than bend awkwardly across the forearm or elbow.
Collect reference photographs of finished sleeves to show your artist the line density, level of background coverage, and contrast style you admire. However, do not expect an artist to copy another tattoo line for line. Reputable Japanese tattoo specialists draft custom stencils or draw directly onto your arm (freehand) to ensure the composition matches your exact proportions.
Finding the Right Japanese Tattoo Artist
A large sleeve is a collaborative partnership that lasts dozens of hours. Selecting the right specialist is the most critical decision you will make.
Portfolio Evaluation and Healed Work
- Look for Large-Scale Cohesion: Check whether the artist regularly completes full sleeves and back pieces, or primarily focuses on isolated flash tattoos. Large-scale work requires distinct composition skills.
- Inspect Healed Photographs: Fresh tattoos always look vibrant. Look for portfolio images taken six months to two years after completion. Clean, well-applied Japanese work features solid, even black backgrounds and crisp linework that remains legible over time.
- Studio Standards: Ensure the studio operates under strict hygiene protocols, using single-use disposable needles, barrier film on all surfaces, and hospital-grade surface disinfectants.
The Consultation Process
Schedule an in-person or formal virtual consultation before booking tattoo dates. Use this meeting to assess mutual communication and technical compatibility:
- Do you typically work from a pre-made stencil or freehand background bars on the skin?
- How many hours per session do you prefer to work on large sleeves?
- How do you price large projects—by an hourly rate or a flat day rate?
- What is your policy regarding touch-ups once the entire project is completed?
Never choose an artist based solely on the lowest price. A large sleeve is permanent living art; prioritizing budget over portfolio quality frequently leads to expensive, painful cover-ups or laser removal later.
Budget, Appointments, and Project Timeline
Large Japanese sleeves require transparent financial planning and calendar management.
Pricing Variables
The total cost of a sleeve depends on several factors:
- Geographic Location: Studios in major metropolitan areas (such as New York, Los Angeles, or Chicago) often charge higher rates due to overhead costs.
- Artist Experience: Established specialists with decades of experience command higher hourly or day rates.
- Arm Dimensions and Design Density: A broad, muscular arm requires significantly more surface coverage than a slender arm. Heavy traditional black-wash backgrounds take more needle time than light, open fine-line work.
Because individual pain tolerance, skin absorption, and artist speed vary widely, reputable artists provide rough estimates rather than rigid guarantees. A full Japanese sleeve generally requires between 20 and 40 total hours of needle time, typically divided into four to eight separate sessions.
Scheduling and Deposits
Most studios require a non-refundable deposit to secure appointment blocks, which is applied toward your final session. Space your appointments approximately three to five weeks apart. This window allows the treated skin to fully complete its epidermal healing cycle before adjacent areas are worked on.
Preparing Your Skin in the Days Leading Up
Healthy, hydrated skin accepts tattoo pigment more evenly, bleeds less, and recovers faster.
- Sun Protection: Protect the entire arm from sun exposure for at least three to four weeks prior to your appointment. Never tattoo over sunburned, peeling, or recently tanned skin. Sun damage inflames the dermis, dramatically increases sensitivity, and makes controlled pigment packing impossible.
- Basic Hydration: Apply a gentle, unscented body moisturizer to your arm daily during the week leading up to your session. However, do not apply heavy lotions, oils, or numbing creams on the morning of your appointment unless specifically directed by your artist.
- Do Not Shave the Area Yourself: Many collectors accidentally cut or irritate their skin with dull home razors, introducing razor burn or micro-abrasions that can harbor bacteria. Professional artists prefer to shave the target area with a fresh, sterile disposable razor immediately before applying the stencil.
- Skin Irritation Protocol: If you develop scratches, bug bites, eczema flare-ups, or skin infections on the arm, contact your studio immediately to reschedule. Tattooing over broken or infected skin poses serious health risks.
What to Do the Night Before Your Session
Your physical condition directly influences your nervous system and pain threshold.
- Prioritize Rest: Aim for seven to eight hours of sound sleep. Fatigue lowers your pain tolerance and accelerates adrenaline depletion during long needle passes.
- Avoid Alcohol and Recreational Substances: Do not consume alcohol for at least 24 to 48 hours before your session. Alcohol thins your blood, which leads to increased bleeding during tattooing. Excessive bleeding dilutes pigment saturation and washes away the artist’s stencil.
- Hydrate Naturally: Drink regular amounts of water throughout the day to support cellular hydration.
- Stage Your Gear: Pack your bag, verify studio directions, and prepare loose-fitting clothing the night before to eliminate morning stress.
Nutrition and Hydration on Appointment Day
Tattooing places your body under controlled physical trauma, triggering adrenaline production and rapidly burning glycogen stores. Arriving on an empty stomach often causes lightheadedness, nausea, or vasovagal syncope (fainting).
Pre-Session Meal Strategy
Eat a balanced, substantial meal approximately 90 minutes to two hours before your appointment:
- Complex Carbohydrates: Oatmeal, brown rice, whole-grain toast, or sweet potatoes provide sustained energy release.
- Lean Protein: Eggs, grilled chicken, or tofu help stabilize blood sugar.
- Moderate Hydration: Drink a normal glass of water with your meal. Avoid chugging excessive liquids right before the session, which leads to frequent restroom interruptions.
Practical Snacks to Pack
Bring compact, mess-free snacks that deliver quick carbohydrates and clean energy during short studio breaks:
- Granola or protein bars.
- Bananas, apples, or dried fruit.
- Trail mix or almonds.
- Electrolyte beverages or bottled water.
A Caution on Caffeine
Keep coffee, pre-workout drinks, and energy drinks to a minimum on session day. High doses of caffeine elevate your resting heart rate, amplify physical restlessness, and heighten nervous system sensitivity to pain.
What to Wear and Bring to the Studio
Comfort and practical access should dictate your studio wardrobe.
Clothing Guidelines
- Tops: Wear a loose-fitting, dark-colored tank top or a button-up shirt that allows complete, unhindered access to your shoulder, chest, and arm. Black or dark clothing prevents accidental ruin from stencil ink or pigment splashes.
- Bottoms: Choose soft, breathable sweatpants or relaxed shorts. You will be sitting or reclining on a vinyl bench for hours at a time; tight denim or restrictive belts quickly become uncomfortable.
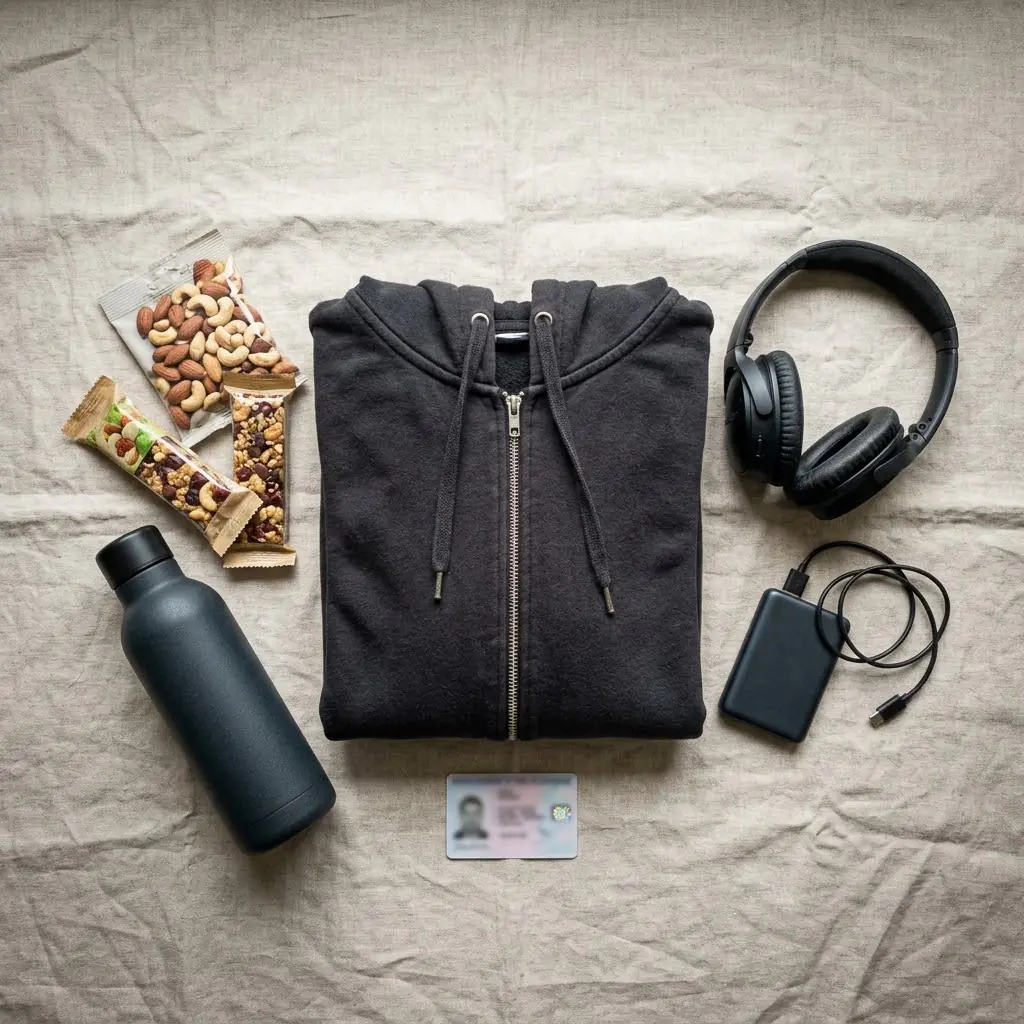
- Layers: Studios are often kept cool to maintain hygiene and comfort for working artists. Bring a warm zip-up hoodie or a soft flannel that can be draped over your un-tattooed side if you feel chilled.
Studio Packing Checklist
- Official Photo ID: Driver’s license, state ID card, or passport (required for liability release paperwork).
- Payment Method: Cash, card, or agreed electronic payment, including an allowance for standard gratuity.
- Hydration and Fuel: Refillable water bottle, electrolyte drink, and non-perishable snacks.
- Personal Entertainment: Fully charged phone or tablet with downloaded podcasts, audiobooks, or movies.
- Over-Ear or Wireless Headphones: Essential for blocking out tattoo machine hum when you need to focus internally.
- Portable Power Bank and Cable: To keep your devices charged during marathon sessions.
Managing a Long Tattoo Session
Enduring a four-to-six-hour tattoo session requires pacing your body and maintaining clear communication with your artist.
Breathing and Physical Posture
When the needle strikes sensitive areas—such as the inner bicep, elbow, or wrist—the natural human reaction is to tense muscles and hold your breath. Tensing up exhausts your body and causes involuntary muscle twitches. Instead, practice slow, rhythmic exhalations as the needle touches your skin, consciously relaxing your shoulders, neck, and un-tattooed limbs.
Communication and Break Etiquette
Tattoo artists want you to be safe and comfortable. If you begin to experience lightheadedness, cold sweats, nausea, or overwhelming shaking, notify your artist immediately:
- Take scheduled breaks to use the restroom, stretch your legs, and eat a small snack to stabilize blood sugar.
- Know Your Limit: There is no shame in stopping a session early. If your pain threshold collapses after four hours, call the session. Forcing yourself to endure agony causes excessive swelling and makes steady skin tension impossible for the artist.
What to Expect After Each Session
Proper aftercare is just as important as the tattoo application itself. A flawless design can be ruined by improper cleaning or premature sun exposure.
Standard Healing Protocol
- Initial Dressing: Your artist will wrap the completed section in either traditional absorbent padding or a breathable medical-grade adhesive film (such as SecondSkin or Saniderm). Leave this initial covering on for the exact timeframe instructed by your artist.
- Gentle Cleansing: Wash the tattoo two to three times daily using lukewarm water and a mild, fragrance-free antibacterial liquid soap. Use your clean fingertips only—never wash a fresh tattoo with washcloths, sponges, or loofahs.
- Drying and Moisturizing: Pat the area completely dry with a clean paper towel. Allow the skin to air-dry for several minutes, then apply a microscopically thin layer of an artist-recommended ointment or unscented lotion. Never suffocate fresh ink under thick coats of product.
- Clothing Protection: Wear loose, soft cotton shirts that will not rub against the peeling skin.
Critical Activities to Avoid
- No Submerging: Do not soak in baths, hot tubs, swimming pools, lakes, or oceans for at least three to four weeks. Submerging open skin creates an immediate risk of bacterial infection and leaches ink out of fresh lines.
- No Direct Sun: Keep the healing sleeve completely shielded from the sun. Once the skin is fully healed (typically four to six weeks), apply broad-spectrum SPF 50 sunscreen daily to prevent black-wash fading.
- No Picking or Scratching: As the tattoo peels and flakes, intense itching is normal. Slapping the area lightly through clean clothing or applying a thin dab of light lotion can help relieve the itch. Never pick scabs, which pulls color straight out of the dermis.
Warning Signs Requiring Medical Attention
While moderate redness, swelling, and clear lymph weeping are normal for the first 48 hours, monitor your arm for signs of localized infection or severe adverse reactions:
- Redness spreading outward significantly from the tattoo margins after day three.
- Increasing, throbbing heat or worsening pain.
- Thick green or foul-smelling yellow discharge.
- Development of systemic fever, chills, or swollen lymph nodes.
If any of these symptoms appear, seek prompt evaluation from a licensed healthcare professional.
Common Mistakes to Avoid Before Starting a Japanese Sleeve
- Underestimating the Total Budget: Running out of funds halfway through a project leaves you with an unfinished outline for months. Plan for the full project cost, including shop supplies and customary tips, before beginning.
- Rushing the Composition: Japanese sleeves take time to design. Trust your artist’s layout recommendations regarding negative space and background density rather than demanding too many competing subjects on one arm.
- Booking Sessions Too Close Together: Scheduling appointments two weeks apart does not give the deeper dermal layers adequate time to regenerate. Respect the three-to-five-week healing window.
- Neglecting Sleep and Meals: Showing up exhausted or dehydrated sets you up for a miserable, painful session. Treat tattoo day like an athletic event.
Final Sleeve Preparation Checklist
1. Before Booking Your Artist
- [ ] Determine your core Japanese motifs (e.g., dragon, koi, guardian lion) and desired background style.
- [ ] Research specialized Japanese tattoo portfolios, verifying clean healed work.
- [ ] Complete a thorough consultation covering design flow, timeline, and pricing structure.
- [ ] Budget for the entire project, including deposits, multi-session fees, and tips.
2. The Week Before the Appointment
- [ ] Apply gentle, unscented moisturizer daily to hydrate the arm.
- [ ] Shield the target arm completely from sun exposure, avoiding tanning or sunburns.
- [ ] Avoid home shaving or harsh chemical exfoliants on the arm.
- [ ] Confirm your appointment time, deposit credit, and accepted studio payment methods.
3. The Night Before
- [ ] Get 7–8 hours of uninterrupted sleep.
- [ ] Avoid all alcohol and recreational substances.
- [ ] Pack comfortable, dark, loose-fitting clothing and an extra warm layer.
- [ ] Assemble your electronics, headphones, charger, snacks, and official photo ID.
4. Appointment Day
- [ ] Eat a wholesome meal rich in complex carbohydrates and protein 1–2 hours prior.
- [ ] Limit caffeine intake to prevent elevated heart rate and restlessness.
- [ ] Arrive punctually with clean skin, wearing dark, loose clothing.
- [ ] Communicate openly with your artist about pacing, breathing, and physical comfort.
5. Between Sessions
- [ ] Follow your artist’s tailored aftercare instructions diligently.
- [ ] Wash gently with fragrance-free antibacterial soap and pat dry with clean paper towels.
- [ ] Avoid pools, baths, hot tubs, and direct sunlight until fully healed.
- [ ] Allow three to five full weeks of skin recovery before returning for the next stage.
Frequently Asked Questions
How should I prepare for a Japanese tattoo sleeve?
Start by researching authentic motifs and finding an experienced Japanese tattoo specialist. In the weeks prior, keep your skin hydrated and protected from sun exposure. The night before, avoid alcohol and get a full night of rest. On appointment day, eat a nutritious, carbohydrate-dense meal, wear loose dark clothing, and bring water, snacks, and personal entertainment.
How long does a large Japanese tattoo sleeve take to complete?
A full sleeve generally requires between 20 and 40 hours of needle time, depending on the size of your arm, the complexity of the design, and the density of the background shading. This time is usually split across four to eight individual appointments spaced several weeks apart.
What should I eat before a long tattoo session?
Eat a balanced meal containing complex carbohydrates and lean protein (such as oatmeal with fruit, brown rice with chicken, or whole-grain toast with eggs) about two hours before your session. Bring portable snacks like bananas, nuts, or protein bars to maintain steady blood glucose during breaks.
Should I moisturize my skin before getting tattooed?
Applying a basic, unscented lotion daily in the week leading up to your session helps keep the skin pliable and healthy. However, do not apply heavy moisturizers, body oils, or numbing products on the morning of your appointment, as these can interfere with stencil application and needle hygiene.
Is it better to complete a sleeve in several sessions?
Yes. Spreading the project across multiple sessions allows the artist to focus on clean execution and gives your body adequate time to heal. It also prevents extreme physical exhaustion, which often leads to severe swelling, reduced pain tolerance, and extended recovery times.
How should I care for my tattoo between sessions?
Wash the area gently two to three times a day using a mild, fragrance-free soap, pat dry with paper towels, and apply a very light coat of recommended lotion. Keep the tattoo out of direct sunlight and completely avoid soaking in baths, hot tubs, or swimming pools until the skin has fully renewed.
About The Author

1 thought on “How to Prepare for a Japanese Tattoo Sleeve: Complete Studio Guide”